
A practical guide to diagnosing skipped strokes, stylus offset, failed pen input, and early-contact behavior by checking the nib, app, screen area, and compatible stylus.
For a controlled EMR stylus troubleshooting process, the most useful starting point is the symptom itself. Skipping strokes, visible ink offset, complete failure to register, and early contact can look related during normal handwriting. Each pattern becomes easier to isolate when the nib, pen, screen area, app, and compatibility are tested one at a time.
The aim is not to guess which component has failed. A low-risk sequence should show what the problem follows. A gap that repeats in one physical screen area carries different evidence from a gap that follows one pen across every page. Likewise, a mark that appears before physical contact needs a different test from a line that simply breaks halfway through a stroke.
This guide keeps those paths separate. It avoids undocumented calibration menus, internal repair steps, forced pressure tests, and assumptions that a new nib or stylus will automatically solve the problem. By the end, the evidence should support one practical next step: continue with a simple compatibility check, consider the correct replacement part, or stop testing and prepare a clear support report.
Symptom labels
Name the symptom first, then see whether it follows the pen, the app, or one physical screen area.
Skipping
A line loses short sections. Repeat the same path in another area and app; if the gap stays with one pen, keep the check pen-side.
Offset
Ink appears away from the visible nib position. Compare center, edges and corners from the same normal writing posture.
No input
Normal contact produces no expected stroke. Check another area and another writing environment before replacing hardware.
Early contact
Writing begins while a visible gap remains. Record a slow side view and compare another confirmed compatible pen if available.
Start With a Clean Test Page Before You Blame the Pen
A diagnostic session should not begin inside an important notebook. Meeting records, marked PDFs, project notes, study material, and long-form handwriting introduce content that can distract from a very small input fault. Instead, a blank disposable page creates a controlled space where every mark has a known purpose.
Keep the test page visually simple. A dense PDF, imported form, zoomed diagram, layered document, or custom template adds extra variables. A plain note page or basic lined page is better for finding a missing segment, a location-dependent offset, or a delayed start.
A useful page needs only a few repeatable marks. Draw three slow horizontal lines, three vertical lines, two diagonals, several small circles, and one large figure eight. Add one continuous line that crosses the center and approaches each edge. These shapes reveal location patterns more clearly than ordinary handwriting because the expected path is obvious.
Writing speed should stay controlled as well. Start slowly, then repeat at normal note-taking speed. A faster stroke can be added later if the fault normally appears during quick writing. Change speed only after a baseline exists, since changing speed, pressure, app, and page at once makes the result hard to interpret.
Normal contact pressure is enough. Pressing harder can temporarily force a weak contact to behave differently, which may hide the original symptom. More importantly, heavy pressure is not a safe way to determine whether the nib, pen, screen area, or app is responsible.
Keep the baseline simple enough to repeat.
Use horizontal, vertical, diagonal and circular marks, then record the app, screen area, stylus model and current tip. Reuse the same page after each single-variable change.
A short record prevents memory from filling in gaps later. For example, “the line sometimes breaks” is difficult to act on. A note such as “three horizontal lines break near the lower-right area in two writing environments” already points toward the next comparison.
That distinction also protects against unnecessary replacement. If the problem cannot be reproduced on the simple page, there is little value in changing hardware immediately. Return to the original app, document type, zoom state, or pen tool once the basic input path has been shown to work.
Check the Nib and Pen Before You Change Software
The nib is the lowest-risk physical check because it can often be inspected without changing software or disturbing stored notes. Look for an obviously flattened point, unusual tilt, visible contamination, looseness, or a tip that no longer appears to sit normally. Still, appearance should be treated as evidence rather than proof, since a worn-looking tip can sometimes continue to register while a visually normal tip may still deserve a model-specific check.
Timing adds useful context. If a problem began immediately after a tip change, the replacement model and seating deserve attention. If the same symptom existed before any nib change, replacing another tip immediately is a weaker next step. In that case, cross-area and cross-app comparisons provide more information before another part is introduced.
For current model matching, the VIWOODS EMR stylus pens collection is the appropriate reference point. Similar appearance should never substitute for confirmed compatibility, especially when the aim is to use a second pen as a diagnostic control.

Pen-side check
Use the W2 reference when the symptom follows one pen or replaceable tip
The product page confirms replaceable Felt and POM tips. Compare the exact pen and tip configuration before treating another nib or stylus as the next diagnostic step.
View W2 Stylus Pro →What not to do during a nib check
A troubleshooting test should not turn into a repair experiment. Filing, sanding, trimming, lubricating, bending, or reshaping a tip changes the part being diagnosed. Likewise, repeatedly pulling and reinserting a nib without a model-specific reason can create a new variable that did not exist when the symptom started.
Hard tapping is also unhelpful. If a line appears only after unusually firm contact, that result does not establish normal operation. Normal writing force should remain the reference condition, because the goal is to reproduce the original problem rather than overpower it.
The pen barrel should receive a simple visual check too. Obvious physical damage after a drop, an unusual gap around the tip opening, or a change that started immediately after impact belongs in the record. Leave the casing closed as part of a low-risk test.
When the nib and pen look normal, the correct next move is not to declare them healthy. The next useful question is whether the symptom follows a particular type of stroke, a screen location, an app, or the pen itself. That evidence is much stronger than appearance alone.
When Strokes Skip, Map the Pattern Before Replacing Anything
Skipping strokes are easiest to see when the intended line is simple. Ordinary handwriting can hide a one-millimeter gap inside a letter or make a missed curve look like a personal writing variation. Long straight lines and repeated circles create a clearer comparison.
Begin with three slow horizontal lines across the center. Then repeat the same marks near the top and bottom. After that, draw vertical lines through the center and closer to each side. If several unrelated strokes break at roughly the same physical location, the screen-area pattern deserves more attention than the shape of the mark.
Repeat the lines at normal writing speed. A gap that appears only during fast movement is still worth recording, but speed alone should not be labeled as the cause. The useful question is whether the symptom remains tied to the same pen, app, or screen position when speed changes.
Same area
Repeat the path in another app, then compare a confirmed compatible pen if one is already available.
Same pen
Recheck tip condition and compatibility, then repeat across several screen areas.
One app
Compare a simple note page before changing hardware or replacing parts.
Not repeatable
Return to the original conditions and change one factor at a time instead of guessing.
When the gap follows a screen location
A location-specific pattern should be mapped, not described vaguely. Mark the area on the test page and draw lines through it from several directions. A horizontal line, vertical line, diagonal, and circle that all break in the same physical region create stronger evidence than a single failed word.
Harder pressure should not become the next test. A forceful stroke changes contact conditions and can hide a light-contact symptom. Keep the same normal writing pressure and move to another app or a second known-compatible pen.
If two compatible pens break in the same location, a single worn nib becomes a weaker explanation. That does not establish a specific screen fault, but it does change the troubleshooting path. Repeated nib replacement now adds less information than documenting the area clearly for support.
When the gap follows one pen
A pen-specific pattern looks different. The same stylus may skip in the center, near the edge, on circles, and in more than one app, while another confirmed pen writes normally under the same conditions. In that case, attention returns to the nib, tip fit, pen condition, and model compatibility.
Even then, the exact internal cause should not be guessed. A replacement tip may be a reasonable test when the stylus uses replaceable tips and the current nib shows wear. However, a new tip should not be described as a guaranteed fix for every intermittent line.
The value of the test is narrower and more useful: it shows whether the missing stroke follows the writing instrument or another part of the setup. That evidence keeps the next purchase or support step connected to a real observation.
When Ink Lands Off the Nib, Check Center, Edges and Viewing Angle
Stylus offset means the pen continues to register, but the visible mark does not appear where the nib seems to touch. A paragraph is a poor test because letters move constantly and the eye compensates for small differences. Small targets make alignment easier to judge.
Create nine small crosses in a three-by-three pattern. Place one in the center, four near the corners, and four midway along the edges. Then touch the center of each cross with the pen held in a normal writing posture. Record whether the visible dot stays centered, shifts in a consistent direction, or changes as the pen approaches an edge.
Viewing position matters during this check. A nib observed from a strong side angle can appear displaced from the ink even when the input point is stable. Judge alignment from the normal writing position first, then rechecked from a near-vertical view if the difference is small.
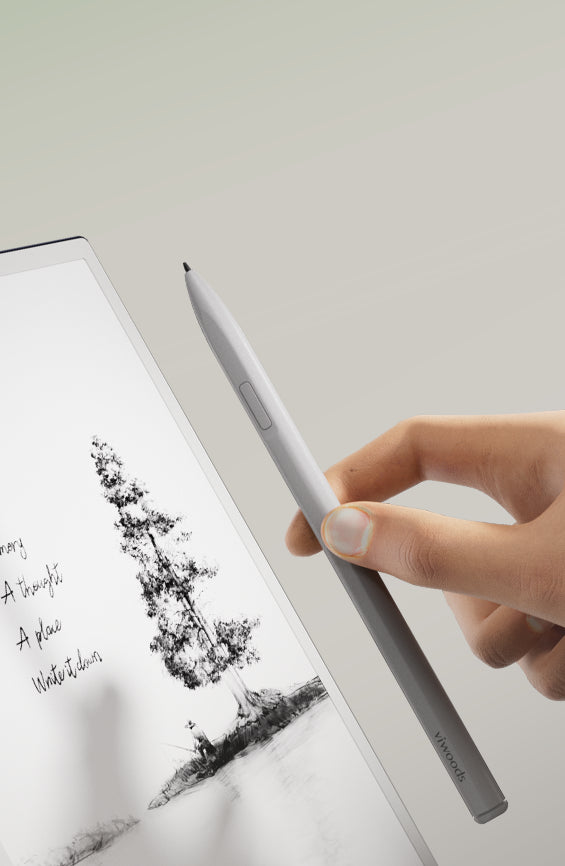
Alignment check
Measure the mark against the visible nib, not against memory
Use fixed targets at the center, edges and corners while keeping the same writing posture. The goal is to map where displacement changes without assuming an undocumented calibration procedure.
View W2 Stylus Pro →Separate constant offset from edge-only offset
A constant displacement across the page and a shift that grows only near one edge are different patterns. If the center and most of the page look normal, map the affected edge at several distances. For example, place targets close to the bezel, slightly inward, and farther toward the center. This shows whether the difference grows gradually or appears only at one local point.
The same map should be repeated in another writing environment. If the pattern remains tied to the same screen positions, the app becomes a weaker variable. If the offset disappears completely elsewhere, application or document behavior deserves more attention before hardware is changed.
Pen angle can be recorded as well, but it should not be manipulated aggressively. Use the normal angle first, then a slightly more upright posture. A large change linked only to an extreme holding angle should not be confused with the behavior seen during ordinary writing.
Do not assume an EMR pen calibration menu exists
Search results for EMR pen calibration often lead to device-specific instructions. Some tablets, operating systems, pen displays, or drivers may expose calibration tools, while another product may handle alignment differently. A menu from another brand or platform should not be treated as a VIWOODS procedure.
No hidden menu, third-party utility, firmware shortcut, or service routine should enter this low-risk sequence unless current official guidance for the exact device provides it. The useful work at this stage is simpler: map the displacement, compare apps, compare screen areas, and compare a confirmed compatible pen if available.
That information is also easier to communicate. A short video showing the nib touching several marked targets can demonstrate direction and location. By comparison, a completed page of handwriting rarely shows where the physical nib was when each mark appeared.
When the Pen Stops Registering, Find Out What Still Responds
A complete failure to register often feels more serious than a small skip, yet it still benefits from the same controlled method. The key question is whether normal contact fails everywhere or only under one set of conditions. That distinction should be established before a stylus is replaced or software settings are changed.
Start in the center of the blank test page. Make a short line, then repeat near each quadrant. If nothing appears, move to another normal writing environment and use the same simple pen tool. Avoid changing multiple settings at the same time, since a successful result after several changes does not show which change mattered.
It also helps to separate “no ink” from “no pen response.” No ink means no visible stroke appears even though another pen-related response may still be present. No pen response means the expected stylus reaction is absent altogether in the tested environment. These descriptions are more useful than the broad statement that the pen is “not working.”
Useful stopping rule: If basic contact fails across several valid writing areas and another confirmed compatible pen shows the same result, stop repeating forceful contact tests. The next useful evidence is the comparison itself, not additional pressure.
If one app fails while another accepts the same pen normally, the pattern should remain app-specific until evidence shows otherwise. A document may be read-only, a writing tool may not be active, or an application may process pen input differently. The exact reason should not be invented, but the cross-app result tells which direction deserves attention.
If a failure began after a nib change, return to the model and seating check. Repeated removal should stop once the correct part appears normally installed. If the same failure persists, a second compatible pen offers more diagnostic value than repeatedly reseating the same tip.
When another confirmed pen works on the same page and screen area, the problem follows the original pen more closely. When both pens fail under the same conditions, a single defective tip becomes a weaker explanation. Neither result proves an internal fault, but each narrows the next step substantially.
When Writing Starts Before Contact, Separate Hover from Early Contact
Hover behavior needs careful wording because pen detection above the screen is not automatically a problem. The relevant symptom is early contact: the device appears to enter a writing state, place ink, or behave as though the tip has touched before physical contact actually occurs.
A side-angle test makes this easier to see. Bring the stylus toward the blank page slowly, pause before contact, touch normally, then lift away slowly. Repeat the motion several times without tapping or pressing harder. The goal is to observe the transition between hover and contact, not to stress the nib.
If early contact appears, repeat the same approach in the center and near another screen area. A symptom that follows the pen everywhere is more informative than one that appears only in a local region. Another normal writing environment can show whether the behavior remains consistent outside the original app.
The nib deserves another visual inspection at this point. An unusual seating position or visible damage can be recorded, especially if the symptom began after a tip change. Still, pushing, twisting, striking, or repeatedly pulling the nib is not an appropriate way to “reset” the pen.
Why slow approach and slow lift matter
Rapid tapping creates ambiguous evidence. The gap between nib and surface is difficult to see, and a brief line may look like ordinary contact. A slow side-view recording can show whether ink starts while a visible space still remains.
Slow lifting can reveal a second pattern as well. If the writing state seems to remain active after the nib leaves the surface, that behavior should be captured in the same video. Again, the purpose is not to identify an internal mechanism. It is to document the contact-state problem clearly enough for a pen comparison or support review.
A confirmed second stylus can then narrow the path. If early contact follows only one pen across several screen areas, the pen-side evidence becomes stronger. If the same behavior appears with another compatible pen, repeated tip changes are less useful and escalation becomes more reasonable.

Second-pen comparison
Change the pen only when compatibility is already confirmed
A second compatible stylus is useful only when the app, page, screen area and normal writing pressure stay unchanged. That isolates the writing instrument instead of creating several new variables at once.
View C1 Ceramic Stylus →What the Problem Follows Matters More Than the Symptom Name
This comparison is the core of the entire diagnosis. A stylus problem becomes actionable when the symptom follows a repeatable variable. Three comparisons usually provide the most value: another app or writing environment, another physical screen area, and another confirmed compatible pen.
The order matters because each step changes only one part of the setup. Moving to another screen area keeps the pen and app constant. Changing apps keeps the pen and tablet constant. Changing pens keeps the app, page, and screen area constant. That makes every successful or failed comparison carry more information than random experimentation.
Signal A · App
If the symptom disappears in another writing environment, keep the investigation software-side before replacing hardware.
Signal B · Location
If the same physical screen area repeats across apps, map that region before blaming one nib.
Signal C · Pen
If the problem follows one stylus everywhere, tip condition, pen condition, and compatibility become more relevant.
Use the comparison as a decision gate
Only one variable should change at a time. If the symptom disappears in another app, keep the investigation on that app or document before replacing hardware. If the symptom stays fixed to the same physical screen area across apps, map that location and preserve it for the next comparison.
A useful location check also distinguishes screen position from content position. If a problem moves when the page is scrolled, the result is different from a fault that stays at the same physical place on the display. That distinction adds decision value without assuming an internal failure.
A second stylus is most useful when compatibility is already confirmed. Keep the page, app, screen area, line shape, and normal writing pressure unchanged, then switch only the pen. If no confirmed comparison pen is available, the existing app and location evidence may be enough to justify support rather than an unnecessary purchase.
Mixed symptoms should stay separate in the record. For example, “skipping in the lower-right area” and “offset near the top edge” are more useful than one broad label such as “inaccurate pen.” The next step should follow the strongest repeatable pattern, not the longest list of possible causes.
Decision rule
When the problem follows one pen, continue with pen-side compatibility or replacement checks. When it follows one app, stay software-side. When it follows one physical screen area with more than one compatible pen, stop treating a single nib as the main explanation.
Replacement Comes After Compatibility and Repeatability
Replacement belongs near the end of the process, not the beginning. By this point, the test should show whether the symptom follows one pen, one app, one screen region, or a particular tip change. That evidence determines whether a nib, another stylus, or support is the most sensible next path.
Current VIWOODS product pages distinguish two useful stylus configurations. The W2 Stylus Pro uses replaceable Felt and POM tip options, while the C1 Ceramic Stylus uses a different ceramic-tip design rather than the same replaceable-tip routine. “Replace the nib” is not a universal instruction for every VIWOODS pen.
When a replaceable W2 tip is the relevant variable, model-specific parts should be checked through the confirmed replacement tips and accessories collection. The purchase decision should follow compatibility and evidence, not the assumption that every skip, offset, or hover symptom comes from tip wear.

Replacement path
Replace a W2 tip only when the evidence stays pen-side
A correct replacement is a useful before-and-after test when the installed W2 tip shows wear or the symptom follows that pen across several valid areas. It is not a default fix for app-only or location-specific faults.
Check W2 Tip Set →When a nib replacement makes sense
A replacement decision becomes stronger when several facts align. The pen uses a replaceable nib, the installed tip shows abnormal wear or damage, the symptom follows that pen across several areas, and the correct replacement is documented for the model. If another confirmed pen behaves normally under the same conditions, the case becomes stronger still.
A nib replacement is a weaker response when two pens fail in the same physical region or when the problem appears only inside one app. Those patterns point elsewhere in the diagnostic tree. Replacing a consumable part may still change the behavior, but it would not be a well-supported first conclusion.
A new nib also creates a useful before-and-after test. Use the same blank page and the same marks immediately after a correct model-specific replacement. If the symptom disappears under the same conditions, that is meaningful evidence. If nothing changes, repeated replacement has little value.
When another stylus is the better comparison
Another pen becomes more useful when the original stylus remains the main variable but the nib does not explain the behavior. For example, a fresh correctly fitted replaceable tip may still produce the same skip in several apps and screen regions. At that point, a known compatible stylus can test the pen-side hypothesis without another round of tip changes.
The alternative stylus should be selected for compatibility, not for marketing hierarchy. A more expensive model is not automatically a better diagnostic tool. The relevant question is whether current VIWOODS information confirms that the pen belongs with the exact tablet being tested.
The same principle applies when comparing W2 and C1 configurations. Their tip designs differ, so the maintenance path differs as well. That product difference is useful because it prevents an instruction meant for a replaceable-tip pen from being applied to a permanent-tip design.
Compatibility questions worth checking before ordering anything
- Is the stylus explicitly listed for the exact paper tablet model?
- Does the stylus use replaceable tips or a permanent tip design?
- If a tip is replaceable, is the replacement set named for that stylus model?
- Did the symptom begin before or after the current tip was installed?
- Does the evidence follow the pen strongly enough to justify a pen-side replacement?
These questions keep the conversion path tied to diagnosis. An accessory page should confirm what fits and what is currently offered. It should not be used to turn an unresolved screen-area or app-specific problem into an automatic purchase recommendation.
When Another Test Adds No Value, Prepare a Support Report
Troubleshooting should stop when the simple variables have already been isolated and the next proposed step becomes undocumented, invasive, or repetitive. Continuing to change settings, press harder, reseat the same nib, or buy multiple accessories does not automatically create better evidence.
A support review becomes reasonable when the same physical screen region shows the same problem with more than one confirmed compatible pen. It also makes sense when a repeatable early-contact condition survives normal nib inspection, when a pen fails across several valid writing environments, or when a correct low-risk replacement produces no change.
None of those patterns proves a specific internal failure. They show that the next useful step may require device-specific guidance that should not be invented inside a general article. That boundary protects both the device and the quality of the diagnosis.
Match the video to the symptom
For broken strokes, draw one long line through the affected area several times. For offset, use visible target crosses and show the nib touching them. For no registration, show the same simple mark attempted in more than one valid writing environment. For early contact, record from the side so the gap between nib and screen can be seen.
A concise recording is better than a long screen capture with unrelated settings. The aim is to reproduce one condition clearly. Likewise, a short written note should state what has already been compared, so the next support step does not need to repeat the entire basic sequence.
Once the investigation reaches hidden service menus, firmware-level intervention, pen disassembly, screen disassembly, or other undocumented procedures, the low-risk path has ended. At that point, official guidance should decide what happens next.
Frequently Asked Questions
Next step · Match the action to the evidence
Use the Result to Choose the Next Step
When the symptom follows one stylus or a visibly worn replaceable tip, current product information can confirm the correct pen or accessory path. The VIWOODS compatible stylus options page can be checked for current pen choices. Separately, the paper tablet accessories page can confirm currently listed replacement parts.
Neither path should be treated as a guaranteed fix. When the same problem survives multiple compatible pens, remains tied to one screen area, or requires undocumented steps to investigate further, stop replacing parts and prepare the test evidence for official support.
| Check Compatible Stylus → | Check W2 Tips → | Send Support Evidence → |
- Repeat the same simple marks before and after any safe change.
- Compare apps, locations, and compatible pens one variable at a time.
- Stop before undocumented repair steps and preserve clear evidence for support.
For EMR stylus troubleshooting, the final decision should follow the evidence: verify compatibility when the problem stays pen-side, replace a model-specific tip only when the nib is a supported suspect, and prepare the recorded pattern for official support when the issue follows a screen area or survives more than one compatible pen.
Guides Paper Tablet
E Ink Tablet for Project Handoffs: Review Notes, Open Issues and Next Steps
E Ink Tablet for Field Teams: Offline Notes, Forms and Daily Review
E Ink Tablet for Executive Briefings: Read, Mark, Decide and Follow Up
How to Evaluate an E Ink Tablet Demo for a Business Team
E Ink Tablet for Compliance Audits: Checklists, Evidence Notes and Follow-Up
Fabric vs Leather Tablet Case: Which Material Fits Daily Carry?
How to Carry a Paper Tablet and Stylus Together Without Damaging the Screen
How to Protect an E Ink Tablet in a Backpack
How to Store an EMR Stylus Safely: Protect the Nib, Magnet and Tablet
EMR Stylus Troubleshooting: Why Strokes Skip, Offset or Fail to Register
Viwoods AiPaper
$549.00

Viwoods AiPaper Mini
$429.00
Viwoods AiPaper Reader Colour
$289.00
Viwoods AiPaper Reader
$279.00